Tuesday, March 19, 2013

Drawing Positive/Negative space and Zentangles

Sara Francis


My drawing classes are off and running with the completion of our first in class project and our first creative sketchbook assignment of the marking period. We have spent the first couple of weeks in class talking about positive and negative space. Positive space by definition is the areas containing the SUBJECT matter in a work of art; the objects depicted, as opposed to the background or space around those objects. Negative space is then naturally, the areas in an artwork NOT occupied by the subject matter, but which contribute to the composition. Negative space can also be background space or empty space but not exclusively. 


We drew simple outline sketches of chairs, focusing on shape and space. The key here: getting to draw the chairs big enough that there would be more positive space than negative space. After completing about 4 sketches, students chose one for a POSITIVE space drawing and one for a NEGATIVE space drawing. In the positive space drawings students were to fill in the space with Zentangle designs. In the negative space drawings, the negative space is filled in with Zentangles. All though simple, the outcome is complicated and beautiful as you can see in the examples above.

Our first sketchbook assignment was to take the zentangles and create a figure using zentangles to create hair! What are zentangles you ask? A Zentangle is an easy, fun way to create beautiful, decorative images using structured patterns. There are some great sources to learn more about zentangles, but the best place is the official web site that you can find here: www.zentangle.com 

Here are some of the assignments:

Erin Jermyn

Meryl Glaser

Michaela Kotob

Veronica Gibbs

Everest Crawford

Jordan Pallazola

Gloria Kabulo


Monday, February 25, 2013

Painting Self Portrait Finals

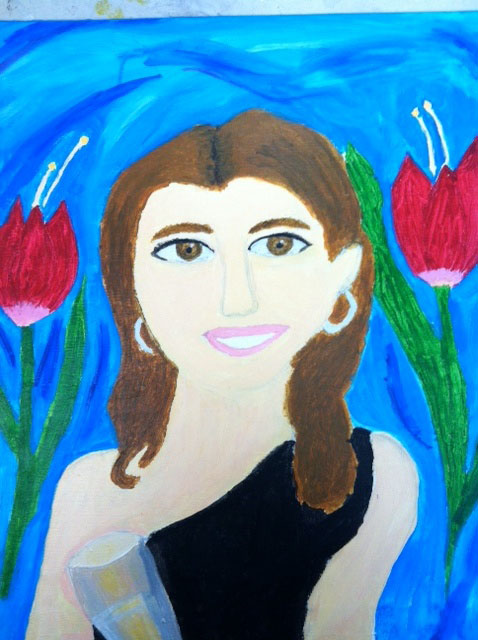
As a final exam for my Painting 1 students, they were to create an expressive self portrait. A task that may seem daunting at first, but once we looked at a little inspiration from the likes of Frida Kahlo, Chuck Close and Picasso~ ideas began to take life. I was thrilled with the results of these self-portraits! I wish I could keep all my students for the whole year. It seems that they just start to get into the swing of things and it becomes time to let them go. Make no mistake, I will be out there like a cowboy rounding up cattle to get them to sign up for Painting 2 being offered next school year! See you then!

Paula Costa


Johayne Miranda


Zoe Plank

Rebekah Montesino

Mikayla Healey

Laura Johnson

Kerri Colby


Jacqueline Wonson


Alfonzo Sanfilippo
Amy Donnelly

Completed Master Paintings

Zoe Plank
It's hard to believe that our semester ended at the end of January and I am just getting to our end of semester round up. Between blizzard days and vacation we have landed almost into March. I wanted to acknowledge some of the fine work that was done by last semester students before I post new work from the current marking period.

Painting Final Products


My A block painting class had a strong finish with their Master Painting reproductions. I know that I had posted a couple but here are more that came out super!

Sophie Donnelly


Laura Johnson

Peter Clark

Rebekah Montesino

Michael Falarano

Allie Biondo


Thursday, December 20, 2012

Master Paintings

Xavier Murdoch

 
Zoe Plank
 
                               
Sophie Donnelly
  My painting students have been working all month on recreating a master works of art through the graphing technique. As a class we focused on the works of art that were created during Expressionism based on the color palette used during this movement. Expressionist painters shared one fundamental aim: to externalize their most profound feeling, which they did principally by distorting the forms of visible reality. Their color was bold, bright and symbolic. Many Expressionist painters implemented the cleaver use of complementary colors which has been a primary focus of our color mixing. Vincent Van Gogh was quoted as wanting to "express in red and green the terrible passions of human beings."

Take a look as some of the completed works of art originally created by Edvard Munch, Etnst-Ludwig Kirchner and Erich Heckel. 
REcreated by Peter Clark, Kerri Colby and Paula Costa. 

"Wolkenschatten" (Cloud Shadows) by Erich Heckel
Painted by Paula Costa

 Etnst Ludwig Kirchner painting, Painted by Kerri Colby

"Forest" by Edvard Munch painted by Peter Clark


Friday, December 7, 2012

Hard at work: Focus on the mouth


Henry Gates

Jennifer & Jessica Palazola with Erica Casucci

Jaclyn Lowe

Both my G Block and C Block drawing classes are still hard at work creating their self-portraits from life. Today's focus was on drawing the mouth. There are some simple guidelines to follow in creating a general shape for your mouth. After the general shape and proportion is there, you will need to go back in a really look at the shape of the lips that you are drawing. Look at the "peaks" of your lip and how your philtrum is formed.

To Start:
Remember the upper lip is made up of three parts and the lower lip of 2 parts (as shown in figure below)
Create a horitzonal  line with a smaller vertical  line in the center.
Using the vertical line, creat a circle in the center of the vertical line (be sure the vertical line cuts the circle in half)
On either side of the circle create an oval that rests on your hoizontal guidlines, touching the circle.
(these are your 3 parts)
Your lower lip will be two symmetrical ovals that meet on your vertical guideline and touch the top oval.
Now, go back up to your small circle created in the first step and make a halo on the top of the circle.
Erase any marks over the halo.
Now, outline the outside shape of your lips, and begin to shade in your lips with the lead of your guidelines.
Go back in and now redefine your lines by looking at the shape of your lips.
Following these steps will give you a jumping off point.

Thursday, December 6, 2012

Hard at work

Gabriela Robinson

All of my drawing students are now hard at work on their self-portraits. We have spent the last two weeks working on proportions of the face and sketching individual parts of the face. 

Here are some things to remember when setting up for a self portrait:
Sketch an egg-shaped oval and divide into halves both vertically and horizontally.
The two horizontal halves are again divided in half, providing 4 equal segments of the head
The eyes are located on the center line, the brows a quarter of the distance around the eyes.
The mouth is one-third the distance below the nose to the chin.
The hairline occupies approximately the top quarter of the head and brow. 
Setting up these guidelines is essential in getting correct proportion.